
One of the suggestions from GRC (graduate research conference - where we present our work to a panel of critics), was to look at some ethnographic sources, American Indian/Inuit cultures etc. to see how the skin of animals was traditionally used.
I'm going to experiment with a couple of examples of garments/shoes from the book:
Robes of White Shell and Sunrise (Conn, R & Denver Art, M 1974, Robes of white shell and sunrise : personal decorative arts of the native American : [catalogue of an exhibition] Denver Art Museum, November 9, 1974-January 19, 1975, Denver Art Museum, Denver.) - thanks Sue!
Robes of White Shell and Sunrise (Conn, R & Denver Art, M 1974, Robes of white shell and sunrise : personal decorative arts of the native American : [catalogue of an exhibition] Denver Art Museum, November 9, 1974-January 19, 1975, Denver Art Museum, Denver.) - thanks Sue!

The first example is a pair of moccasins cut from one piece of leather - one piece for each shoe that is! (p. 30 - 31)

I photocopied the pattern onto an A4 sheet, then used a grid to grade it to my size, using the length of my foot as a guide.

The book says that the moccasins are made from buffalo leather. “Since these moccasins are cut from soft, flexible leather, they soon take on the exact shape of the wearer’s feet” (Conn 1974, p. 30) I chose a side of thin vegetable tanned leather that is mouldable, while still having a firm grain that will hold the shoe shape – it’s a bit like belt leather but a thinner split.


I needed to work out a way of sewing the shoe together. The original picture looks like it's an overcast stitch, but I was having a look at a leather craft book and decided to use something fancier.

I found this example of “woven stitch” on page 31 – 33 of “Leathercraft by Hand” (Faulkner, J 1976, Leathercraft by hand, Pelham Books, London.) It is quite simple as the holes are punched in a square formation and 1hole used twice as part of the “weave”.


Here’s my punched holes:


I used a 3mm wide kangaroo thronging that I happened to have at home to lace/sew the shoe together. I’ve never done this before so it was an interesting process. I butted the edges together rather than overlapping like in the leathercraft book.


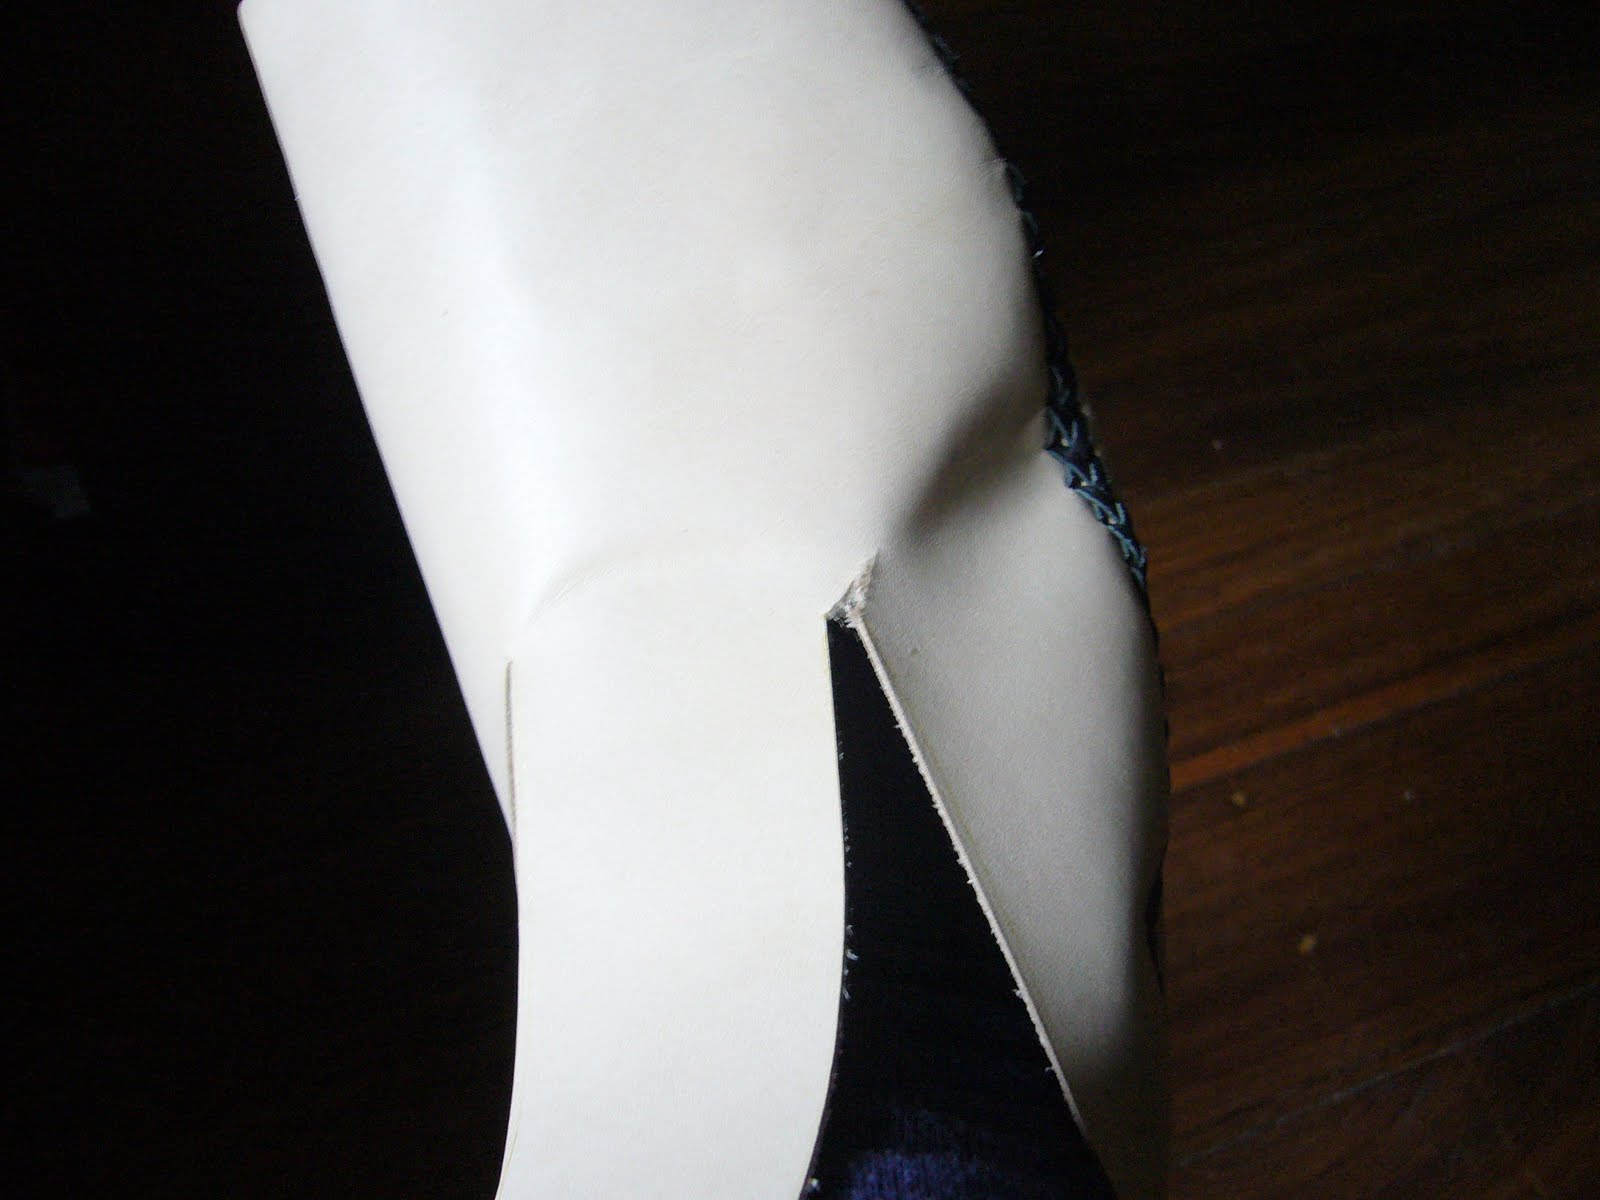
One side of the centre back seam ended up too long – I didn’t prove/check the pattern as I wanted to use the proportions exactly from the book. The shoe has turned out too large around the foot, so if the size was reduced to make this seam fit, it would improve the fit.

The shoes are a little hard to put on as the cut area which forms the tongue doesn’t quite allow enough room to put the foot in, and the end of the split also becomes a weak point. This weak point tore a little on one of the shoes when first putting it on.
I’m going to wear the shoes as much as I can to see how well they mould to my feet as a test of the properties of the leather. They might not be tight enough for the experiment to work – I may need to make another pair to test further.

I wore them at home all day today and they are actually very comfortable. Updates coming soon!

looking good. can i make a suggestion for the finish at the tongue. instead of just cutting to the mark. it may not tear as easy if you end the cut with a small punch hole.
ReplyDeleteThanks george - great suggestion! I need you as my advisor :o)
ReplyDelete